
No matter what you want to paint, there are a variety of house painting tools and equipment designed to do the job such as rollers, brushes, power painters, etc.
With the information that I provide below on each type of tool, you’ll be able to not only choose the right tool for the job but be armed with the knowledge on how to use it for various applications and you’ll feel like a pro!
And always try to go “Green” with your painting products – especially the cleaning supplies and paint removers, etc.
Some of the links below are affiliate links, meaning, at no additional cost to you, we may make a commission if you click through and make a purchase.
Table of Contents
1. Rollers – Important Tips
Rollers and Brushes are the most common house painting tools that we think of. The roller that suits large flat areas like walls can’t paint into corners, nor can it keep its speed advantage on surfaces like pipes and columns.
So you need a brush, or special rollers for those jobs, and for cutting in around trim at windows and doors. But it still leads the field as a time saver. The pros and cons of hand painting tools are simple.
The roller is four to five times as fast as the brush, and, unlike the brush, it produces professional-looking results even in the hands of an unskilled user.
But it is not as versatile as the brush.
Originally designed for painting interior walls, rollers with specialized sleeves or attachments simplify other indoor and many outdoor painting jobs as well.
A roller firmly screwed onto an extension pole or broom handle lets you tackle ceilings without a ladder and do floors without bending down.
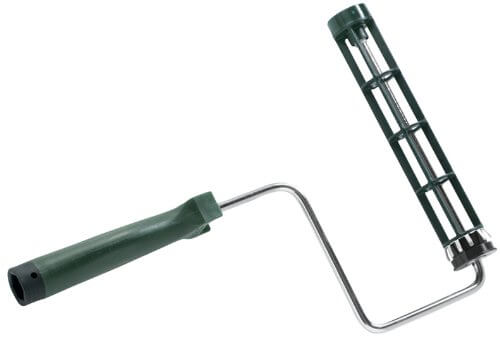
Frame design. A traditional roller frame has a spring-type mechanism called a cage to hole the pile cover, or sleeve, that applies paint.
A well-designed cage will hold the sleeve securely without needing a wing nut and, at the same time, will permit you to slide the sleeve off and on easily.
A cage should spin smoothly on nylon bearings. The handle and frame should feel sturdy in your hand.
Roller frames come in many sizes to hold special-purpose sleeves, from the V-shaped doughnut for painting inside corners to short 3-inch rollers for doing trim.
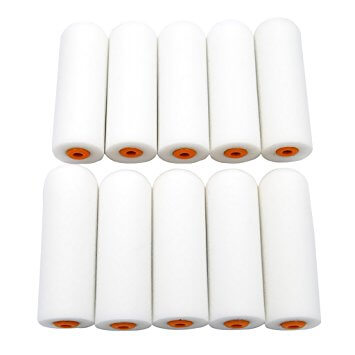
Roller sleeves. The best covers have a uniform, fluffy, lint-free pile and a tough water-resistant center. Cheap roller covers hold less paint, splatter more, and tend to mat.
Rollers are made to suit the type of surface on which they will be used, often classified by manufacturers as:
- smooth (like plasterboard);
- semi-smooth (textured wallboard);
- rough (light stucco);
- very rough (concrete block or brick.)
The “nap length” or “pile height” of the roller covering varies accordingly. For smooth surfaces it’s ¼ -inch, for semi-smooth, 3/8-inch to ½-inch, for rough ¾-inch, and for extra rough, 1 ½ inches.
A smooth grade roller used on a rough surface will leave unpainted gaps and spots. A rough grade roller used on a smooth surface will overload the surface with paint, producing sags and runs.
Always buy to suit the job.
Roller quality involves the type and density of the pile fibers. It is not merely a matter of durability.
Higher quality pile produces a smoother, better covering job with less effort. As the best roller cover costs less than a quart of typical house paint, it is wise to use a quality grade.
Sleeves also come in different fibers. Lamb’s wool is best for applying oil-based paints; Dynel works well with water-based paints.
Acetate and polyester can be successfully used with either. Mohair covers give the smooth, textureless finish that high-gloss enamels and varnishes need.
Don’t allow paint to harden on the roller during the overall painting job. (Wash the roller thoroughly at the end of the day, or keep it immersed.)
As you’re not likely to repeat a major interior or exterior house painting job for several years you’ll save time and trouble by simply discarding the used roller covers.
TIP: If you are going to continue painting with the same paint and color the next day or two, I’ve found that keeping the sleeve wet and rolling it up in a household plastic wrap will keep it ready for use.
2. On Brushes – What You Need to Know
The brush requires more time and skill, but it is still the most versatile painting tool and the best for certain types of work. It is, for example, the best choice for fine enamel and varnish work.

The bristles of a brush may be either natural or synthetic, as nylon or polyester.
Natural bristles are set in the brush in the same relative position they occupied on the animal, with the large inner (skin) end inward, the smaller outer end outward.
The better synthetic bristles are set in the same way and are also made with a taper.
The typical taper of a three-inch-long high-grade nylon bristle: 9/1000-inch at the large end to 5/1000-inch at the small (outer) end. (Low priced brush bristle lack the taper.)
The tips of quality nylon brush bristles are also flagged – producing a split end that holds and distributes paint better. (Natural bristles already have this feature.)
The China bristle used in many quality brushes is a hog bristle, named for its national origin. The Tientsin type from northern China is long and fine, as the animals grow a thicker coat in that colder area. These are suited to fine enameling and varnishing. The Hankow bristle from southern China is shorter and stiffer, suited to heavier paints.
In general, both natural and nylon bristles work well in all conventional paints, though natural bristles tend to lose some of their resilience in water paints.
Nylon bristles do the same in alcohol finishes like shellac. (Cure the nylon floppiness by turpentine immersion and thorough drying.)
TIP: If summer heat takes the spring out of nylon bristles during exterior painting with water paint (for which nylon is ideal), use an occasional ice-water dip to cure the trouble.
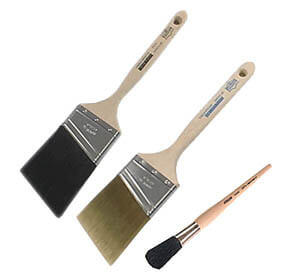
Brush shapes and sizes should be matched to the job – wide brushes for large, flat surfaces like walls and ceilings, narrow ones for narrow surfaces like moldings and trim. (Brushes fit into fluted molding forms better than rollers or pads.)
As brushes actually become shorter with wear, a wide brush frequently is drawn broadside along a narrow molding, so that only a central brush portion is used, may develop a center notch, forming what painters call a “fishtail.”
Drawn sideways along a narrow molding, its bristles tend to pack into numerous separately bent “fingers.” Either way, the brush becomes unsuited to its original large area work.
To avoid this problem, use narrow brushes for narrow work.
Sash brushes may be round, oval, or flat angle-cut ends. The angle cut prevents the finger formation mentioned above. All three do the job effectively.
The choice is a matter of personal preference.
Personally, I enjoy using the flat angle-cut sash brush as it gives me a nice edge to do the cut-ins at the top of walls near the ceiling and around trim work.
Your best final guide in selecting a brush suited to the work: a comfortable “feel.” If you like the way a particular type of brush handles when you use it, you’ll do better with it.
Buying Tips:
The best brushes are full and thick. Each bristle will be “flagged” on the tip – looking like human hair with split ends – to hold more paint. The bristles should feel springy, not stiff, when you press them against your palm, and they should fan out evenly.
Bristles should be firmly glued on either side of a divider that is no more than a third of their width and held by a band (the ferrule) fastened with nails. Handles should be sturdy and comfortable to hold.
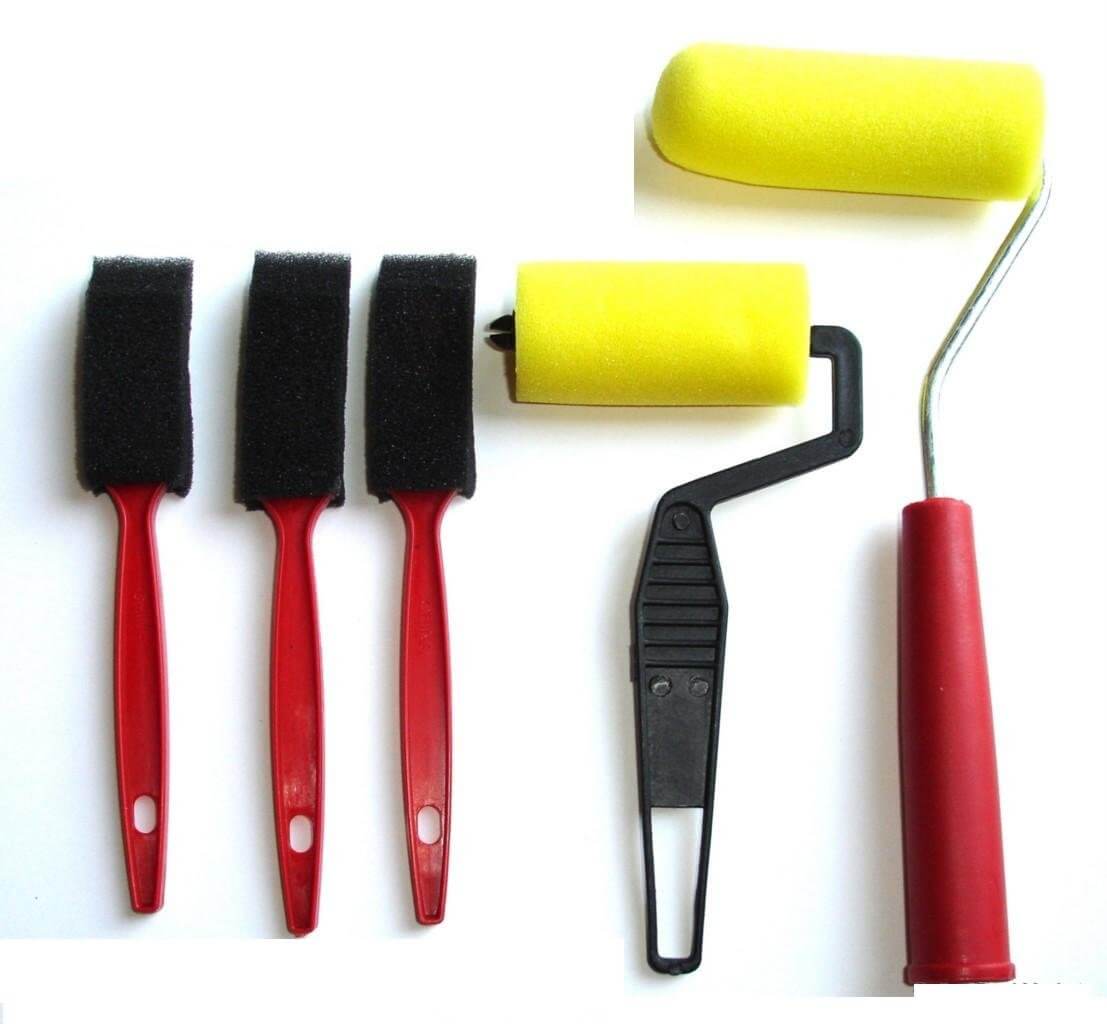
3. Pad Applicators – What are they?
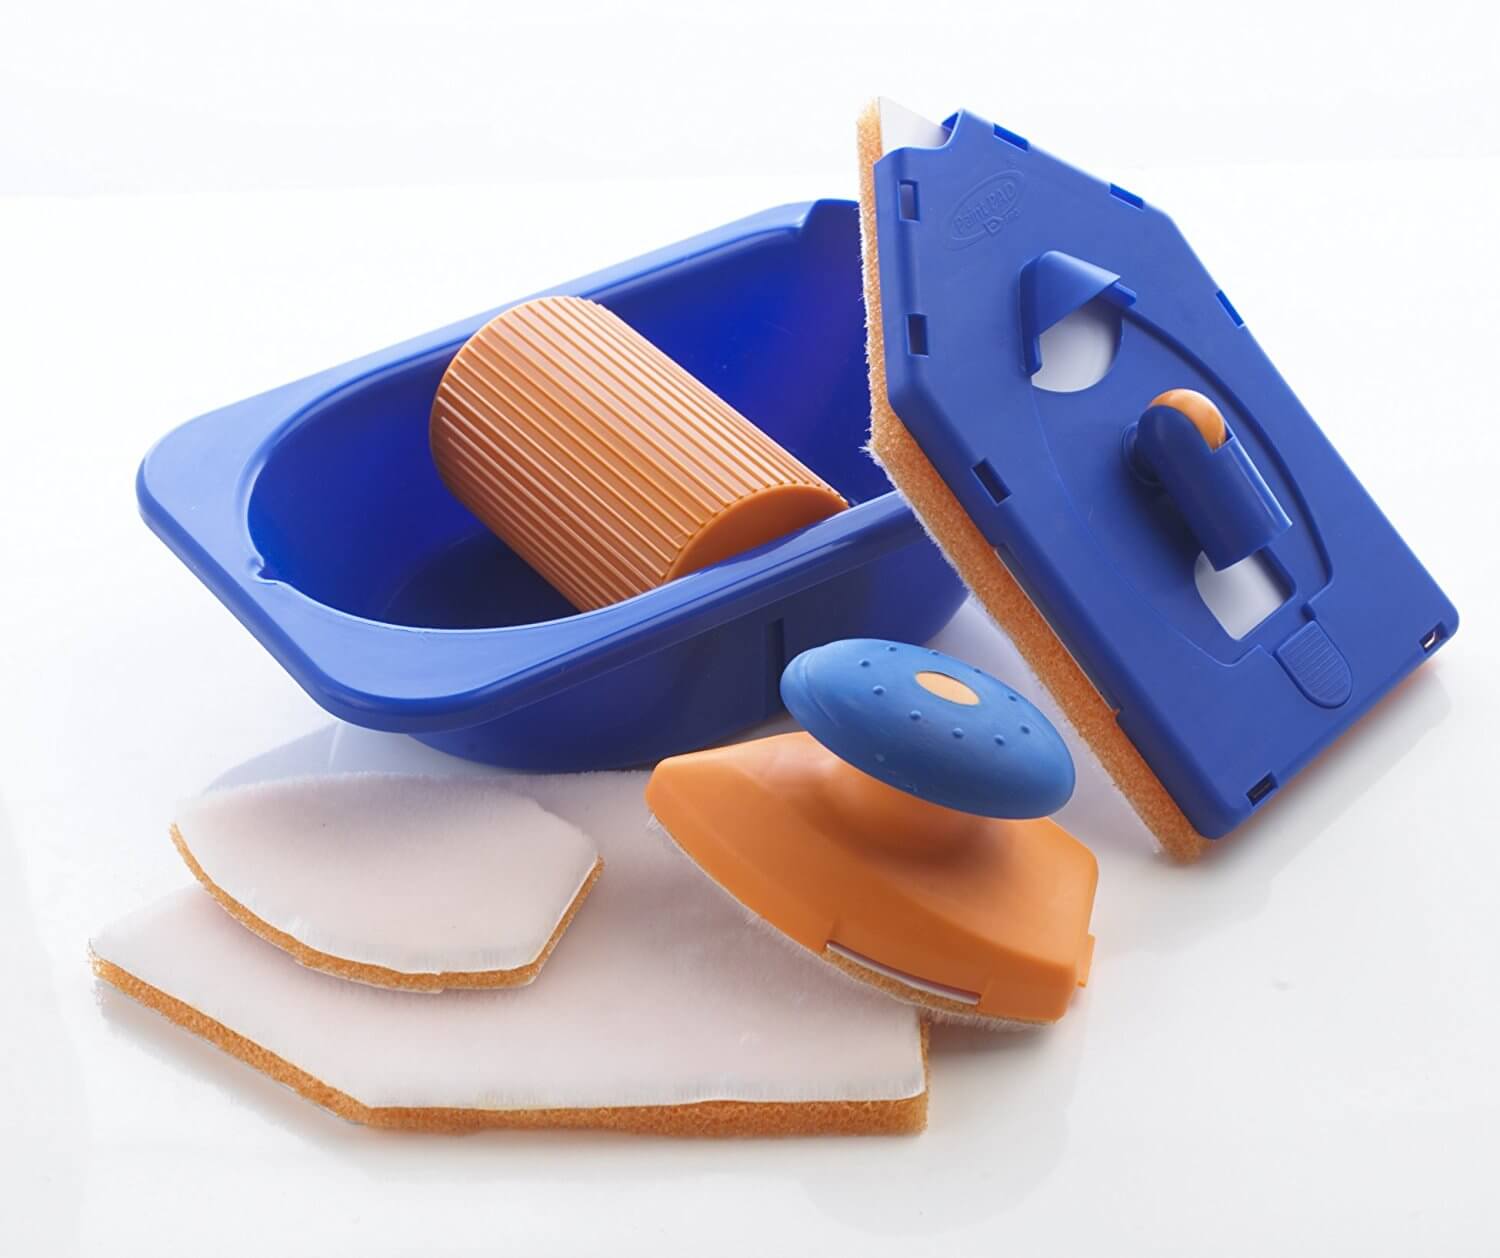
The pad applicator, which slides instead of rolling, now often replaces the brush for the special purposes just mentioned.
And many new pad applicators have features that eliminate still further the skill required by the brush on the same type of job.
The wheel-edge roller, for example, with its wheels riding along the ceiling, lets you apply a different color to the wall without irregularity or spillover along the line of juncture.
The corner roller, on the other hand, paints into vertical corners, applying a starting stripe of the same color on two adjoining walls in a single pass.
So:
It’s a good idea when painting with a pad applicator not to overload it.
I find that pressing it on some newspaper once or twice after loading the pad with paint, helps distribute the paint on the pad and takes off any larger “blobs”.
Using the wheel-edge roller type of pad, it’s very important not to get any paint on the wheels itself, especially when applying a different color than the adjoining wall or ceiling.
Not everyone is comfortable with paint pads. For many painters who use brushes with confidence and satisfaction, paint pads seem to match neither the control offered by brushes nor the speed associated with rollers.
Others, however, find paint pads efficient to use and easy to care for.
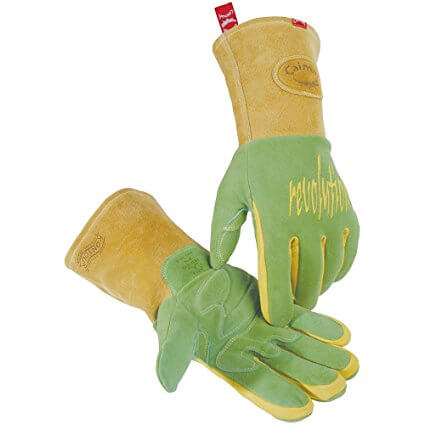
4. Paint Glove – Choosing the Right One
The mitt or paint glove has a paint-holding nap for quick coverage of staircase balusters, railings, gutters, or pipes.
Wearing the glove, you just dip it into the paint, then clasp your thumb and forefinger together around the object and move the glove down the length until the surface is coated with paint.
5. Power Painters – Do You Need Them?
For a big job, roller painting can be sped up with an appliance that automatically releases paint from a central source to its specially designed roller by way of a long hose.
A button on the roller handle lets you adjust the flow.
The advantages: You don’t have to keep reloading the roller from a tray or bucket every few minutes. When you are working from a ladder, you are saved the inconvenience of moving both the latter and your paint supply each time.
Models powered by electricity, a hand pump or a CO2 cartridge all perform essentially the same tasks. They come with a brush and pad attachments as well as roller frames with a variety of sleeves in different naps.
The drawbacks: Cleaning these appliances, particularly the hoses, is time-consuming. So is maintenance. They waste ample amounts of paint.
Their best use is for exterior house painting with big areas to cover and lots of ladder work.
6. Tools for Prep Work
Of course, beyond the actual house painting tools of rollers and brushes for applying the paint, we have to think about what is required during the all-important “preparation” stage…
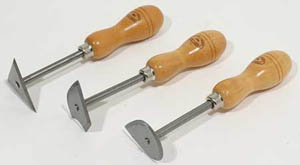
Shavehook, or molding scraper
The triangular shave hook, or molding scraper, digs accumulated paint and dirt out of the crevices in decorative woodwork.
Similar tools with different heads scrape paint off curved wood molding.
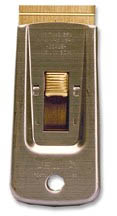
Razor scraper
The razor scraper uses standard blades and takes paint off glass.
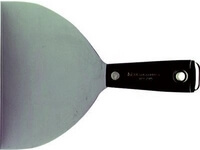
Wall scraper, or wallboard taping knife
The 6-inch flexible wall scraper, or wallboard taping knife, remove wallpaper and softened paint from flat surfaces.
It is also used to level off applications of plaster compound.
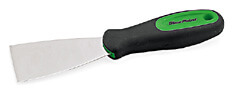 Putty knife
The flexible putty knife is equally versatile, but for smaller jobs. A 2″ putty knife is the best tool for patching most cracks and holes.
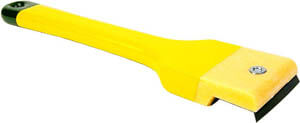 Hook scraper
The hook scraper, which you draw toward you, takes paint off flat wood surfaces like windowsills and door frames.
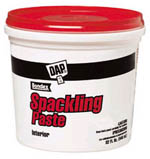 Spackle
This is the most common patching material. It dries quickly and sands easily. Spackle comes pre-mixed and is very easy to work with.
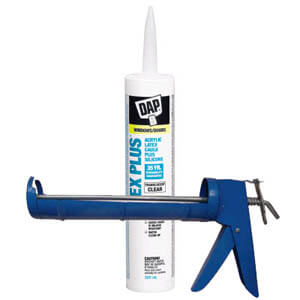 Caulking gun and latex caulk
Use a caulking gun to patch cracks where two walls meet, where the wall meets the ceiling or where the wall meets the door jamb, window, trim or baseboard.
Latex caulk dries in minutes and can be painted without being primed.
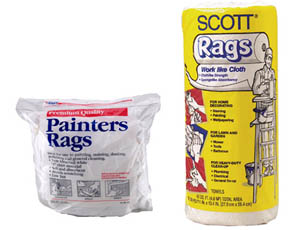 Rags
Rags
The best painter’s rags are lint-free and absorbent.
But any rag will do.
Many paint stores sell rags by the pound or in rolls. Use a damp rag to wipe excess caulk from the wall.
That’s the way to do a good-looking, clean, professional job.
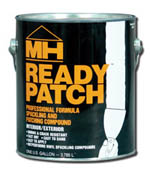 Patching material for large or deep holes
Use a quick-drying patching material to fill in most of the hole.
Leave the patch slightly underfilled. This type of material is difficult to work with and very hard to sand smooth.
When the quick-dry patching material has set up, use Spackle to bring the patch up flush to the wall surface.
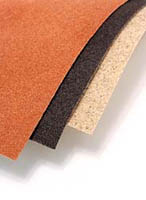 Sandpaper
Use fine-grade sandpaper (number 220) for sanding spackle.
Rougher sandpaper will leave scratches that are visible under the finish coat.
Use a rougher grade (number 100 or 150) when sanding off rough edges around holes, cracks and peeling paint. Then patch and sand to finish the job.
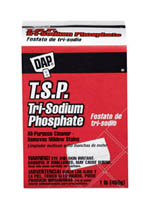 Washing compound (T.S.P. – trisodium phosphate)
Use T.S.P. to clean grease and heavy tobacco smoke off walls. T.S.P. comes in powder form and is mixed with water.
Use rubber gloves if you expect to work with T.S.P. for very long.
When you’ve finished washing walls and ceiling with T.S.P., rinse the surface thoroughly with a sponge mop.
T.S.P. leaves a residue that prevents paint from bonding to the surface.
More Painting Tools For You
There are so many painting tools out there that it may not be possible to get your hands on the right one.
Sanding Sealer
Sanding sealer has historically been a useful piece of painting equipment, albeit, a liquid one.
This “tool” was developed to solve a problem.
When solvents come into contact with bare wood, the wood fibers tend to lift, resulting in a rough surface that requires a lot of sanding to make the surface smooth enough for a topcoat.
As the first coat on new wood, a sanding sealer makes the sanding between coats easier and less time consuming, a potential time and money saver for the homeowner or professional painter alike.
The Problem
Alkyd sanding sealers are designed to be used as a wood sealant only where the topcoat is going to be an alkyd varnish.
It is not recommended when the plan is to use a polyurethane varnish as the topcoat.
Elements in the alkyd sealer can react, over time, to those in polyurethane finishes, and the result can be the peeling of the polyurethane film.
Alkyd type varnishes are few and far between. The industry has moved over to using urethane varnishes instead.
In my opinion, this industry change renders the alkyd sanding sealer almost useless and is a product that I wouldn’t use.
Lacquers Are Different
The sanding sealers that are used for lacquer finishes are different.
These have been formulated to provide excellent film build with good results when applied following the application instructions on the can or technical bulletin.
They are formulated to allow lacquer to bond to the sealer undercoat.
If You Use The Alkyd Type
They are intended to be used un-thinned. They can be applied by brush (true bristle is best), roller or airless spray.
Mineral spirits or varsol are used for cleanup.
Remember, if you plan to use it under urethane or polyurethane varnish, there is the potential that the bond may fail and the polyurethane may start to peel off.
Paint Strainers
Paint strainers are an inexpensive solution.
We’ve likely all been there. Finished up a paint job with ½ gallon of good, and probably, expensive paint, left.
We put the lid on good and tight, and it’s a year or so before we realize that we need some of that color of paint to re-do a section of wall.
Uuuggh?
Off comes the paint can lid, and because of half-can of air left in the can when it was last sealed, your ½ gallon of paint has a ¼” thick skim over the top of it.
And, you could do like I did one time. I simply broke the skim, stirred it all in, and then re-rolled a wall.
When I was done, I scraped the wall and bought fresh paint.
But please don’t. There is a better way.
The Better Way
Using a screwdriver or paint stir-stick, break the skim, and haul out as much of it as you can.
Stir the rest of the paint like crazy.
Simply grab one of the disposable, low cost, paint strainers you picked up from your pro paint store the last time you were in, and strain that globbed up paint into a clean receptacle.
Problem solved.
Low-Cost Solution ~ Save Paint
The paint strainers I’m speaking of cost a couple of bucks for a package, look something like a drip coffee filter, are made of paper, and are disposable after one use.
Do yourself a favor and pick up a package the next time you are at your paint store. Having them on hand is the secret to resolving the “chunky paint” issue very quickly, and it will only add a couple of minutes to your project.
Liquid Vapour Barrier
A what? Yes, a liquid vapor barrier. Also known as a liquid vapor barrier.
Let us hypothesize that you have just, finally, purchased that gorgeous century home that you have ached to get your hands on for such a long time.
Substantial Renovations
You take possession and realize that there is substantial renovation to be done.
You follow up with your local building inspector, and you are informed that your home doesn’t have sufficient vapor barrier and you won’t be able to get the renovations approved.
Yikes! Your options are to rip the interior walls down, perhaps add insulation, and then the correct vapor barrier or…. and this is a big or, and only if the building inspector approves, consider trying a liquid vapor barrier.
Vapour Barrier Alternative
The one I’m familiar with is a latex, waterborne vapor sealer. It’s applied with a brush, a roller or can be sprayed on.
What makes this primer/sealer special is that is has a perm rating (a measure of air passage through the medium) of around .6 when applied at the rate of 400 sq. ft. per gallon.
That is normally good enough to be considered the equivalent of a 2mm sheet of plastic.
Check With Building Inspector
Check with your building inspector, should you find yourselves in this situation, to see if this product would do the job for you.
If it is acceptable, visit your professional paint store (I know the Glidden / ICI stores have this product) and check out their supply.
If so, then apply the product ~ which can be tinted if desired ~ and then topcoat it with your favorite colored paint.
And no, regretfully, adding a second coat of liquid vapor barrier will not increase the effectiveness or double the barrier rating.
Muriatic Acid
Muriatic acid is just that, an acid, and as such, care must be taken with use it safely. It does burn!
It is a dilute form of hydrochloric acid. Once again, it is dangerous. If you use it, take care!
Why Use It?
For the painter, this acid is a valuable tool.
When a cement/concrete floor is “floated” by the contractor, large paddles are used to mechanically smooth the surface of the concrete, imparting almost a glossy finish to the cured concrete.
Now you come along and try to paint this slick, smooth, almost impervious surface. Good luck!
What Does It Do?
In order to prepare your basement cement floor for painting, you need to roughen the surface.
In painter parlance, you need to give the floor a profile, in order for there to be enough places for the paint coating to bite into or stick too.
You can use a grinder, or even a sweep blast to roughen the floor, or you can use muriatic acid.
The proper use of muriatic acid will “acid etch” your concrete floor, creating the profile necessary to allow your floor paint to bond.
Visit your local pro painting store and ask to read the containers of muriatic acid they sell.
Note that it usually comes in a plastic container, and when diluting the acid, you are best to do that in a plastic bucket.
Caution When Mixing
Dilute the acid as per the instructions on the container. Often that will be one part of acid to ten parts of water.
DO NOT EVER add water to the acid. Always fill the bucket with water, and then add the acid to the water so that it dilutes properly.
If you reverse that process, you may get severely burned as there could be a violent reaction.
Always add the acid to the larger volume of water!
Wearing the appropriate safety equipment, in a well-ventilated room, apply the acid solution to the floor. A long-handled brush works best.
You will see the acid working almost instantly, with foaming and some off-gassing. The gas created is not good for you, nor does it smell good, so, again, well ventilated is the key.
Wait a few minutes (or whatever the directions on your container say) and then flush with copious amounts of water.
Often, as you flush with water, the chemical etching will continue. Keep flushing with water until the foaming/chemical reaction stops.
That may require repeated flushings with clean water.
When an application of fresh water to the floor does not result in a chemical reaction of any kind, the job is done.
Wait for the floor to dry thoroughly, and this may be a week or so, before applying any paint.
Danger
The rinse residue from a muriatic acid etch is considered as hazardous waste.
The acid will etch, and perhaps, destroy anything it comes in contact with, including, but not limited to, drain pipes, sewer pipes, might harm septic systems, any flora or fauna it comes into contact with…. it is not good stuff!
Read and observe all safety recommendations of the manufacturer, and don’t just dump residue anywhere.
Alternative
I have not used it myself, so I cannot comment on its efficiency, however, phosphoric acid is commonly recommended as a safer to use alternative to muriatic acid. I will research this product.
Please see the page on Phosphoric Acid for more information on this product.
Spackling
Spackling is, depending on the manufacturer, a lightweight, pre-mixed, general purpose repair compound.
Again, depending on the manufacturer, it is rated for use indoors and out, and is suitable for drywall repair, filling small depressions and nail holes, cracks in – and broken – wood, crevices etc.
Packaging
One of the nice things about spackling is that it comes in a host of packages, from very small few-ounce up to larger tubs for lots of hole filling.
You can, therefore, just acquire the size that suits the job. No waste.
Preparing For Use
The area to be filled must be completely dry. Clean it or vacuum it to remove any dust, dirt, and to remove any loose paint or plaster.
If there is grease or wax present, the spackling will not bond properly.
For small cracks, do widen them slightly with the edge of a putty knife or small slot screwdriver, trying to make the edges undercut so that the spackling can bond better.
Application
Apply the paste to the crack or hole with an appropriately sized putty knife. The blade must be wider than the hole being patched, to enable a smooth surface on the patch.
The more the spackling is worked, the faster it will set, so avoid over-tooling.
For a final stroke, and to completely smooth the surface, dip the putty knife in water, and draw the blade over the patch.
Then leave it!
Clean the tools and your hands with soap and water.
Topcoating
The total dry time will depend on the size of the patch and its depth. The more spackling, the longer it will take to dry.
If you have used a lot of spackling in a patch, though most brands claim their formula is shrink proof, many patches will shrink a bit when drying, so be prepared to add another layer.
When the patch is complete to your satisfaction, sand lightly with #120 or #150 grit to make the surface smooth.
Patches must be primed to seal them so that the overall topcoat will not show different sheens in the patched areas.
When the primer is dry, topcoat with your paint of choice.
P.S.
If you don’t close the container immediately after removing some compound, or forget to close the lid entirely, your spackling paste will become rock hard, and you will be heading to the professional paint store for another container.