
Prepping your house properly before painting is one of the most important steps when tackling an exterior painting job on your house. Find out exactly what it involves in our guide.
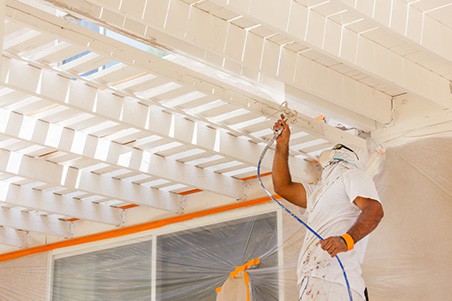
A good paint job protects wood siding and trims from water damage and rot while it guards metal gutters, downspouts, and railings from rust and corrosion.
And in preparing for an exterior painting job, all the seams and joints in the outer shell of the house have to be inspected and recaulked. Remember though, Safety Comes First – especially the proper use of ladders.
No method is effortless. A certain amount of handwork – scraping, washing, and sanding – is required.
Here’s a checklist for examining your house and planning exterior painting preparation work:
Some of the links below are affiliate links, meaning, at no additional cost to you, we may make a commission if you click through and make a purchase.
Table of Contents
Wood Siding
- Make needed surface repairs and recaulk joints.
- Countersink bleeding nails and coat with metal primer
- Fill holes with putty
- Scrape and sand smooth
- Prime raw wood
Wood Shutters
- Remove from house and mark location on each.
- Scrub and sand smooth
- Work on shutters in garage or workshop when the weather is bad
Windows
- Sand down wood, or wire-brush metal frames
- Replace missing putty
- Apply appropriate primer (rust-inhibiting for metal)
Doors
- Check weather stripping and replace if necessary
- Remove brass hardware and polish it; coat with acrylic lacquer to retard oxidation
- Scrape down any flaking paint
- Repair cracks or hole with wood putty and sand smooth
- Apply primer to raw wood areas
Gutters and downspouts
- Check for leaks and clogs; make repairs
- Flaking paint should be wire-brushed off metal outsides to make a smooth surface
- Apply an appropriate metal primer
Soffits
- Strip smooth with a wire brush and a sander
- Check for mildew and treat if necessary
- Apply primer to raw wood areas
Fascia boards
- Often behind gutters, they need sanding down to sound paint.
- Seal any knots
- Check for mildew and treat if necessary
- Apply primer to raw wood areas
Wrought-iron trim
- Sand down rust spots to bare metal with a wire brush attachment on an electric drill
- Apply a rust-inhibiting primer
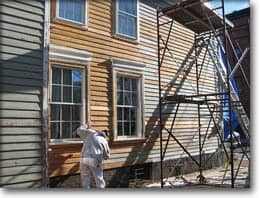
Exterior Painting Preparation – Wood Surfaces
Cracking and peeling paint are common on wood siding. It’s time to put some elbow grease into the work and start the scraping and sanding.
I recommend using a high-pressure washer if there are more than 200 or 300 square feet of siding to prepare.
Using a High-Pressure Washer
A professional pressure washer delivers up to 2,000 lb. per sq. in. of water power to remove loose paint from siding and shingles.
It minimizes scraping chores and then cleans when detergent is added, which makes the exterior painting preparation much easier and quicker.
Hold the tip of the gun at an angle to the surface being blasted. This helps water lift paint off the surface.
The disadvantage to water blasting is that it leaves the wood saturated with water. You have to wait until the wood has dried completely before painting.
A sweep with a high-pressure blaster can inject water deep into the old wood. It may be several days before this water finds its way back to the surface and evaporates.
Paint too soon and you’ll have a rapid repeat performance of the cracking and peeling paint job that you’re attempting to remedy.
Sanding the Wood
 Your next step for exterior painting preparation is to sand the wood surface. This creates a smooth, even finish and removes any old paint that was missed by the pressure washer.
Use a hand-held disc sander for this work. Sanding a large surface by hand takes too long and doesn’t do as good a job as a disc sander.
On the first pass with the disc sander, use a rougher grade of sandpaper. Then finish up with a finer grade of paper.
The grade to use depends on the condition of the surface. You may have to try a couple of grades until you find the right one.
Note: that rougher grade papers can gouge the wood. Be careful not to press too hard or dwell in one spot too long.
Hold the sander with both hands and move it in the direction of the wood grain – not across the grain. Wear safety goggles and a dust mask when using an electric sander.
Keep sanding until you have a smooth surface ready for finish paint.
Clean off the sanding dust and debris first – a tack cloth does an excellent job of removing the dust that would prevent your paint to adhere properly.
New Wood Surfaces
Preparing a new wood surface is usually easier. But prep is still necessary. Start by removing all sap and wood splinters.
Then sand in the direction of the wood grain. You may want to start with rough sandpaper.
Final sanding should be with finer paper. Next, use a knot sealer to seal knotholes and areas where sap has accumulated.
All bare wood must be sealed with a high-quality exterior primer before applying the finish coats.
Peeling Paint on Wood Siding
 Excessive moisture can cause blistering, peeling, and discoloration.
Another important step in exterior painting preparation is to identify and eliminate any sources of moisture.
Water from rain, melted snow behind ice dams, or condensed water vapor may be getting into the siding behind the paint.
Check for leaks in roofs and sidewalls.
Are insulation, vapor barriers, and ventilation adequate?
Make sure moisture from a clothes drier is vented to the outside. Check for leaky plumbing or deteriorated caulking around a bathtub or shower.
Repair the blistered surface by removing all loose paint. All bare wood must be sealed with a high-quality exterior primer before applying the finish coats.
Cross-Grain Cracking
After many repaintings with oil-based paint, the built-up paint may get too stiff to stand the constant expansion and contraction of the wood below.
The result will be cracked paint. The only remedy is to remove all paint down to the bare wood. Then prime the surface properly and repaint.
Exterior Painting Preparation – Metal Surfaces
Using a Wire Brush Attachment
A wire brush attachment for an electric drill speeds stripping of metal surfaces like aluminum gutters and downspouts and wrought-iron railings.
Wear goggles and gloves to protect yourself from flying paint chips and grit.
Galvanized Surfaces
Avoid painting newly galvanized metal surfaces until they’ve weathered for about six months.
Galvanized metal comes from the factory with a residue of the manufacturing process and stain inhibitors that prevent good paint adhesion.
Weathering tends to neutralize the surface, making it more ready to accept paint.
If you need to paint galvanized metal right away, wash the surface with a mild acid such as vinegar. Rinse it thoroughly.
Then apply a proper primer for metal/galvanized surfaces.
Iron and Steel
When you’re painting iron or steel, the most important thing for this exterior painting preparation step is to provide a good surface contact.
These metals rust when air and moisture get under the protective coating. That’s why surface preparation is so important.
First, use a wire brush or power sander on the metal surface followed by a rinse with solvent. Then use a medium or slow-drying primer with good wetting characteristics.
If the existing paint is still in good condition, remove any loose paint and sand to feather broken edges around where the metal is exposed.
Then spot prime before applying the finish coat.
Cleaning the Surface
Another important aspect of exterior painting preparation is to create a nice “clean” surface in order for the paint to properly adhere.
Pressure Washing
You can use pressure washers for general cleaning of large exterior surfaces such as siding.
Most pressure washers can be used to apply cleaners, for example, a degreaser can be used to remove stains).
You’ll also find a variety of wands, brushes and other hose-end attachments for applying different types of cleaners.
Also called power washers, these machines send a high-pressure water spray to scour away dirt, grease, grime, chalking paint and other contaminants.
If you don’t want to invest in a pressure washer, you can rent a gas-powered model from most tool rental shops.
Hose Brush Attachment

Using a hose brush attachment with an extension pole speeds washing painted surfaces.
You can also save yourself some painful stretches when trying to reach higher places.
They don’t cost too much and their benefits often outweigh the costs.
Once you got one, you want to do the following:
Mix a solution of T.S.P. (or another heavy-duty detergent), chlorine bleach, and water.
Rinse with clear water.
Without this treatment grease, dirt, and pollutions will keep new paint from adhering.
A Garden Sprayer
A garden sprayer also can be used in exterior painting preparation.
It is ideal for treating mildew-infected areas with a 3:1 water-chlorine bleach solution (no detergent), which kills the fungus.
Don’t rinse the area, but allow it to dry before painting. If mildew is not completely eradicated, it will reappear under the new paint.
Protect Against Splatters
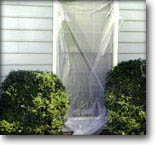 For another exterior painting preparation step, protect your foundation plantings and nearby shrubbery with drop cloths.
This is because a paint film on leaves and blossoms can keep them from breathing and may cause irreparable damage.
Old clothes or even paper, anchored with weights such as stones or bricks, should be placed on paved walks, patios, driveways, etc.
Masking of windows with newspaper and masking tape minimizes clean-up, speeds the work and makes trim painting easier to do.
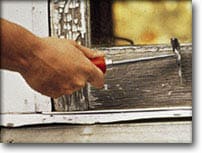
Windows
If window sash is in good condition it is only necessary to make certain that the surfaces are clean and that may lose or blistered paint has been removed before starting the repaint job.
Windows are particularly prone to moisture problems because of the large glass area that acts as a condenser in cold weather.
Thus, bringing a flow of water down over the bottom of the frame whenever the condensation reaches the extreme.
The melting of ice on storm sash does much the same thing.
At this point, it is a good idea to replace old putty to stop annoying rattles as well as air leaks that make your home drafty in winter.
Caulking around window and door frames should also be done now.
Ok, now that all of the exterior painting preparation is done, it’s time to proceed with the actual exterior painting (finish/top coating).
Exterior Paint Colors – Making the Right Choice
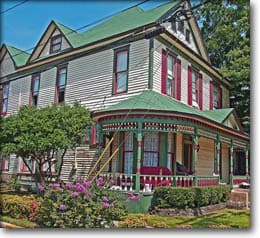 Exterior paint colors, if chosen effectively, can draw attention to your house’s best architectural features and minimize its defects.
Paint protects the exterior of a house; color makes it attractive and inviting.
Although there are no absolute rules for picking exterior paint colors, some guidelines are helpful.
Start with the colors you can’t change: the roof, brick facing, a stone foundation or chimney, a flagstone walkway to the front door.
Look for paint shades that match or harmonize with these colors.
Then consider the immediate neighborhood. You may want your house to be distinctive, but not out of character with the rest of the street.
One architectural style may lend itself better to some colors than to others.
A Spanish-style stucco, for example, almost demands light pastels, whereas a Maritime vernacular house can take deeper, richer colors.
Landscaping may be significant as well: A house heavily shaded by trees will disappear if you paint its main body in dark colors, which absorb light.
Dark colors look best when the house dominates its setting and gets plenty of sunshine.
The basic components of an exterior paint colors scheme are body color, trim color, and accent color.
If you live in a Victorian house with a number of interesting architectural details, you might even consider four colors.
Adding a second, contrasting trim color to call attention to intricate moldings or ornate brackets that might be missed otherwise.
Body color.
This is the dominant color that can most change the look of a house. A light body color makes a small hose appear larger.
A dark body color can bring a big, rambling house into proportion.
Whatever the color, painting an odd-shaped porch or an ugly garage door the same shade. This is because the body of the house will visually integrate the awkward features into a more harmonious whole.
Pick the body color first.
It should either contrast with the roof color or be a variation of it.
A light to medium shade is the safest choice, particularly if your house has large expanses of siding. (Dark colors always look darker on the house than they do on a paint sample.)
Body color is also affected by sunlight. It is worth the extra money to buy a trial quart of paint, paint a section of your house.
Then observe how the color looks at different times of day before making a final commitment to the color.
Trim color.
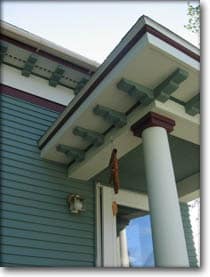
This usually is applied to fascias, soffits, cornice moldings, window frames and sashes, door frames, and porch railings.
White or off-white soffits reflect light onto the areas below.
To downplay a part of a house that is flawed, paint soffits with a body paint color.
White windows seem bigger and brighter.
The trim color has a lot to do with the way the exterior comes out.
If you choose the right color and paint it well, the exterior will shine.
But if you fail to do a good job, you might not like the outcome. Even the most quality of paints won’t change the final results.
This is why it’s important to at least pay attention to the trim color when you are treating your house exterior.
Accent color.
Contrasting exterior paint colors that highlight special features of the house, an accent is most effective when it is used sparingly.
Often only the front door is painted with the accent color. A warm, intense color like deep red can make the entrance of a house an inviting focal point.
It is also common to paint shutters the accent color. The front door can then be given the same color, or it can be highlighted with a second accent color.
Testing color schemes.
If you want to change the exterior paint colors of your house, try out different combinations on paper or better yet, using your computer, before investing in a paint.
I’ve come across a program called Color Style Studio.
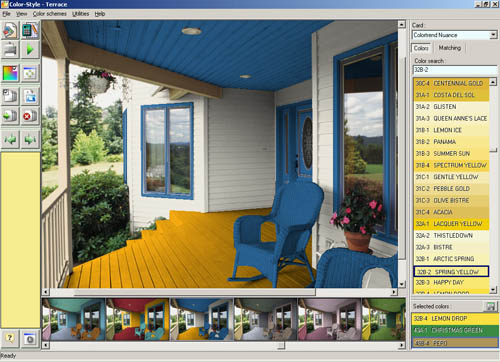
This impressive software enables you to select exterior house colors using photos of real objects such as a house, an interior, an exterior and more from about 85 different sets.
And there are more then 45000 various colors. It also offers a free trial download version as well.